
Storytelling Through Computer Animation
Assignment A20: morphing
Objectives- Learn a 2D animation technique called morphing which, though not required, can be incorporated into your final projects
Here is some 2D terminology:
- Each still image which is shown in rapid succession giving the illusion of movement in an animation is called a frame.
- Key frames are frames which define the starting and ending point of a smooth transition between frames.
- Tweening is the process of automatically generating intermediate frames between two images to give the appearance that the first image evolves smoothly into the second image.
- Tweens are the drawings generated between the key frames which help to create the illusion of motion.
Step one: Get a program and some files to use for this tutorial
- Download and install FotoMorph from CNET: http://download.cnet.com/FotoMorph/3000-2186_4-10845768.html?tag=mncol;6#editorsreview
- Start FotoMorph
- Download the attached zipped folder morph.zip to a convenient folder that you can find your laptop.
- Right-click on this folder and unzip.
- Double-click on the file madscientist-monkey.FMP which is a project file from FotoMorp.
- When morphing, it is important to begin with images which are exactly the same size--this should be the case if you do screenshots from Alice. In this case they are 400 x 300 pixels.
- On the projects screen, make sure the resolution of your final morph is correct--it should set to the same size as the original images, though it is okay if it is off by a pixel or two.
- Preview your animation using the previewer arrow. You should see the images blend and flip back and forth.
Step three:
Smooth out the image tween
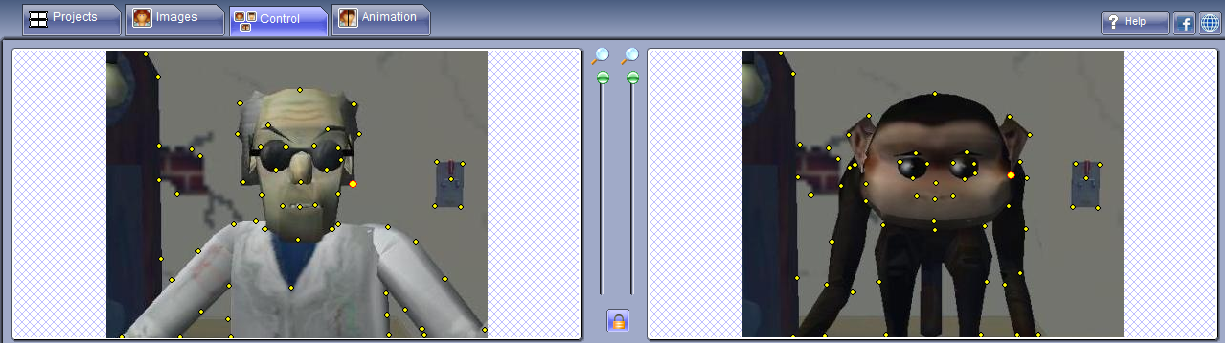
- You can add source
and destination points in the Control area. (More points will
smooth your morph.)
- Again, click the preview button to see your animation.
- You can add other animation features like moving text if you'd like.
- On the animation tab, you can export your moph. I recommend the avi format which can be posted and viewed on the web directly or incorporated into your final movie using MovieMaker.
- Be sure to save your project.
Your task: (which is to be completed individually, though consultations are encouraged...)
In this assignment, create an animated e-card which uses 2D animation, being sure to use the following:
- Create an image morph between two images of your choosing.
- save the project as yourusername.FMP.
- Use an artists statement to explain the morph. Save the artist's statement as yourusername-A20.doc.
- Post the morph to youtube and include the link in your artist's statement file.
- Both original images
- yourusername.FMP.
- Yourartist's statement yourusername-A20, which must include a link to the morph you created.
- zip the folder and upload to Moodle