Events in RoboLab
Objectives
- Learn about events and event-driven programming
Tools and Parts Needed
- Constructed 2-Wheeled "Tracker" Robot
- A touch sensor
- A light sensor and method for attaching to the Tracker
Event-Driven Programming
Humans handle events with ease. Even if we are doing something else, if our cell phone rings, we can stop what we were doing and answer it. It is not necessary for humans to be actively waiting to hear the cell phone ring in order to know that we might choose to answer it if it rings. The reason we do not need to wait is because we understand the cell phone's ring to be an alert.. The same is true for text messages. We need not actively be staring at the screen on our phone in order to read a text message when it comes in because the phone will alert us with a beep or other signal.
In this class, we have not yet learned to program our robots to "hear" these types of alerts when they are doing something else. As of now, our robots only know how to actively wait. You may have found that sometimes programming to "wait for something to happen" can be tricky when you want to wait for multiple things to happen. Event-driven programming is a computer programming paradigm, meaning that it is a different way of thinking about programming, where the program continually watches for something without stopping and waiting. We have seen this event driven idea in how we handle our cell phones and text messages, but also in how the computer uses a GUI--a GUI does not stop to wait for a given key-stroke, instead the computer is alerted when a keystroke happens.
An event is a programming construct which is like an alert. Setting up an event is called monitoring and is a bit like choosing the ring on your cell phone--since you know your phone's ring, when other people's phones ring, you don't recognize the ring, so you do not jump to answer them, but when yours rings you recognize it and act accordingly. The advantage to using events is that your program can continue with other tasks while the event is being monitored. For this reason it is very useful to use events to get out of infinite loops created by jumps. Once the event is triggered, the program will automatically skip to the Event Landing Block and continue from there. To program for an event in RoboLab, two icons must be used:
 . The green icon Starts
Monitoring for the event, and the red icon is a Event Landing Block to
jump to when the event occurs. Multiple events can be programmed by
using different even modifiers
. The green icon Starts
Monitoring for the event, and the red icon is a Event Landing Block to
jump to when the event occurs. Multiple events can be programmed by
using different even modifiers 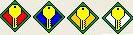 as labels, but note that but
there can only be one event landing even if there are multiple events to
monitor.
as labels, but note that but
there can only be one event landing even if there are multiple events to
monitor.Example: Line Following with Events
The example line follower program given below uses a red event to trigger a change in direction. In this code, a wait for dark "Red Event" is set-up immediately after the begin program icon. Then a blue infinite loop is begun. Then monitoring for the Red Event is begun. For ever after that, the program will wait for the light to drop below 50 on sensor input 1. The next set of four icons will make the robot beep continuously while it turns. When the light sensor value drops to 50, the program will jump to the event land, reverse direction and then repeat the process.

To try the code: right-click here.
Note that a common mistake in event programming is forgetting to include an infinite loop after the start monitoring block. If there is no red loop, the program will pass onto the Event Landing without having triggered anything. In the example, if there were no red loop, the program would stop motor A almost immediately after is started, regardless of the light value. Note also, that there is no way out of the red loop without the Event Landing!
Multiple Events
Just like single events, multiple events can be setup in the same code to track different variables which might be monitoring sensors on different inputs. Remember that all event structures must have the same Event Landing. This means that if three events are set-up and only one triggers, the program will have to determine which one of the three changed so it can perform the appropriate action.
In the following code we see a conditional whose test condition is based upon the event and two different outcomes will occur based upon the event which occurs. Two push events are used to control the motion of a robot. After setting up both events, monitoring is started and an infinite loop is run. (This is done to prevent the code from reaching the event landing block prematurely.) If the Red Event on touch sensor 1 is triggered, the code will take the upper path in the event fork and stop motor A. If the Red Event was not triggered, then by default, the Blue Event must have been triggered and the code will take the bottom the path of the fork. Three or more events can be checked by increasing the number of event forks.
Your Task
First, use pseudocode to design a program which does the following:- Your robot must include sections in which it drives forward, backward, and turns each for random times. All this should loop continuously.
- However, your robot should use event-driven programming to keep a count the number of black or green lines it crosses, displaying this updated count on the LCD screen. The robot should beep whenever it encounters a line and count every line it crosses regardless of whether it was traveling forward, backward, or turning when it crosses the line.
- Be sure to include explanatory comments to your RoboLab code by
using the Edit Text icon:
 In particular, it is
required that you add the following comments:
In particular, it is
required that you add the following comments:
- Lab L12
- All of your team member's names
- Appropriate comments of crucial code sections
- Finally, modify your pseudocode, robot, and RoboLab program to improve your robot's performance.
- Answer the questions in your Lab Report.
Your Lab Report
All lab reports should be self-contained and should contain all of the following information at the top:- The lab number: Lab L12
- How long each person served in each of the roles:
- Driver:
- Navigator
- Your Pseudocode: Include the final version of your pseudocode in your Lab Report.
- Your Robot: Briefly describe which sensors and actuators need to be attached to which ports for your implementation.
- Your Success: In a paragraph or so, describe how to use your program and whether or not your robot functions as desired. If not, what goes wrong and under what conditions?
- Comments and Suggestions: Write a paragraph that summarizes your team's reaction to RoboLab and to this lab. If there are any problems you encountered or any questions that remain, please ask! Also, be sure to include any suggestions you have for how this lab could be improved.